Since 1981....
SERVICE
PARTS
ACCESSORIES
FABRICATION
ENGINE CONVERSIONS
RESTORATIONS
We're Second to None!
Home
![]() News
News
Latest
LAND-ROVER Restorations
Rover
Motor Co History
North American Specials
Aston Martin / Historic Photos
Cool LR Photos, THRUST 2, THRUST SSC
Tamed Racing Driver
Updated: 1/2013
Visit our other sites....
www.OffRoadExperience.com
www.westcoastbritishracing.com
this site is protected by Copyright 1981-2012 All Rights Reserved.

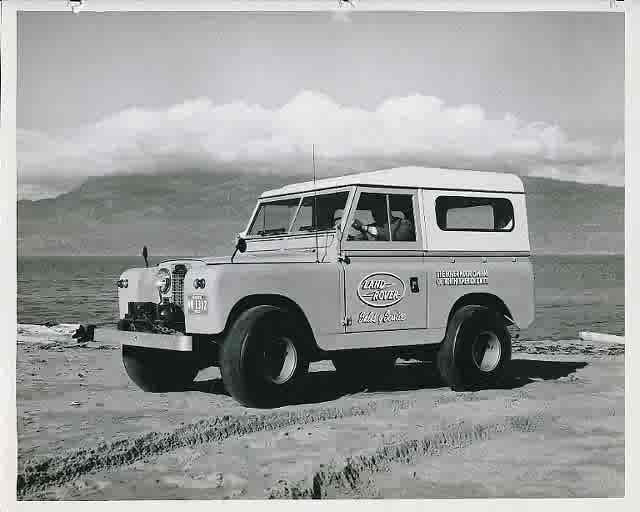
1964 Hi-Floatation for Shell Oil
Jim Joss in Canada
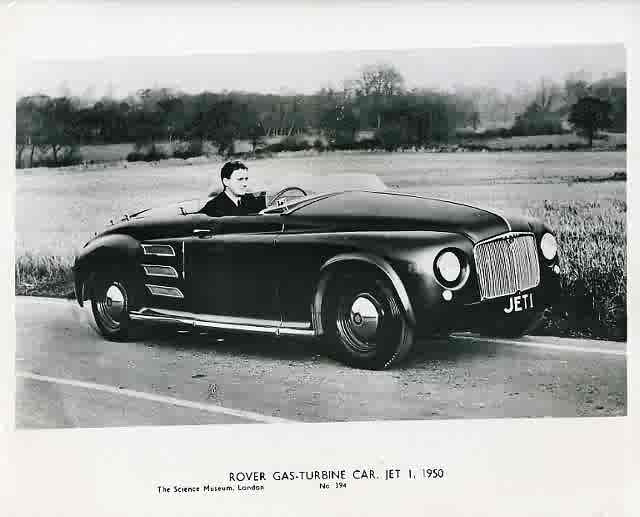
Jet-1 1950
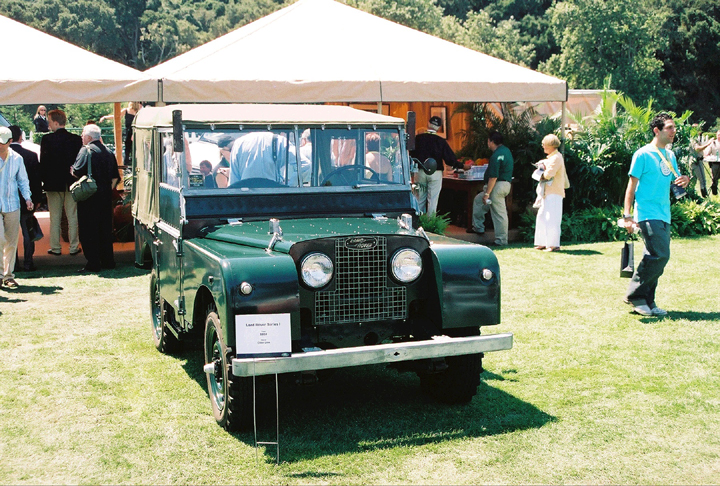
80" at Quail Lodge.

?
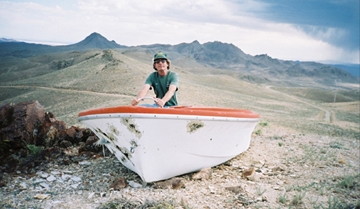
Boating Nevada style!

It's Not a Christmas Party 2005.

Our Fire Crew 2006!


![]()

| West Coast British -
Technical Bulletin 190 Airway Blvd., Livermore, CA. 94551. Phone 925-606-8301/Fax 925-606-8302 Date: August 3, 2005 Subject: Rovers North Disc Brake Kit Vehicle: Land Rover Series II/IIA/III We purchased a RN Front Disc Brake conversion kit recently for a customer, and would fit to a 1963 88” Land Rover. We were not very pleased with the “kit” upon its arrival, finding that it really wasn’t a “kit”, meaning; not everything to do a first class conversion was included. And… we ran into a number of snags. First off, the following items are NOT included with said “kit”: Swivel Ball x2, Swivel Bearing x2, Railko Bush x2, Railko Washer x2, Swivel Shim Kit, Upper Swivel Pin x2, Axle Shaft Roller Bearing x2 (inside swivel ball), Front Stub Axle x2., and oil seal retainer. Now, knowing most of these cars are old and tired, all the above named parts must be replaced to make this an acceptable “conversion”. Instructions; Or should we say, Lack of? There are no instructions supplied (yes, we called and asked). Bolt Confusion; For reasons unknown to us the upper and lower swivel bolts (8 ea) are METRIC (12mm x 1.25tp), when the originals were 7/16”BSF in most cases. Most would think this is not a problem… but it is. The 12mm bolts fit too tight in the steering arm and swivel pin, thus all holes must be bored to 31/64” (most do-it-yourselfers do not own a drill press, which is needed). Warning: If you do not clearance the holes, you will find it difficult to fit related parts, and could damage the treads on the bolts. Also, to be correct, the bolts should have a shoulder on them and they do not. More Confusion: All threaded holes in the new castings need to be cleaned and chased with the correct size taps or thread chasers. The upper & lower swivel holes, along with the Brake Caliper holes are all 12mm x 1.25tp, whereas the Stub Axle are 3/8” UNF, and the swivel seal retainer bolts are 1/4" UNF. The bolts supplied for the swivel seal retainer are too long, replace with 5/8” long and use flat washer along with lock washers supplied. The Swivel: Drain all oil, and disconnect front brake hoses. Once you’ve removed both of the old swivels, make sure you keep the steering arms, as you’ll have to re-use them. After cleaning, make sure to re-size the holes (above). Inspect swivel pin, replace if needed (meaning, rusted). Fit new o-ring to pin, and then set aside. Remove oil seal from axle casing, fit new #217400 oil seal. Clean axle casing joint surface 100%. Fit new bearing race to lower swivel ball, and Railko bush to upper hole. Fit ball to axle case with 2 bolts and nuts (use new 3/8 UNF with nylocks for final assembly). Fit axle shaft roller bearing to back of swivel ball, 1-each. Now with casing in the correct position (brake caliper to rear), slide the taper bearing into its race and slide swivel housing over bearing & railko… slide the upper pin into its hole to temporary hold everything in place. Using black Hi-Temp silicone lightly smear lower face of swivel and o-ring on steering arm, Loctite (red) the 4-bolts (12mm) and fit arm. Torque bolts to 50-ft lbs. Remove upper pin, drop fiber washer into Railko. Using new shims (this is trial and error to get it right), shim the upper swivel pin and insert fully (do not force!), fit 2 bolts (no Loctite) and do up by hand… if swivel locks up, add more shims. Once you can tighten bolts to the 50-ft lbs of torque, check bearing pre-load (drag) with a poundage gauge (8 to 10 lbs). Adjust with shims to increase or decrease drag. Once this is completed, you can now Loctite (blue) the upper 4 bolts and fit, torque to 50-ft lbs. Repeat on other side. Now remove bolts holding swivel ball to axle casing… mask/cover ball before painting new swivel housing. Swivel Seal fun: The standard II/IIA/III Swivel seal does fit, but the retainer ring does NOT. Sadly the holes machined into the new housing do not line up 100%, so some filing is in order to fit it. Also, trimming will be needed to allow the brake caliper bolts (2) and wrench fit. Once you've completed adjustments, fit 1/4" x 5/8” with lock & flat washers… make sure to use anti-seize on threads. When doing up bolts (6) you’ll see that the retainer will distort, this is because the seals sits too high when compared to the case surface. Hubs & Bearing: First off, the hubs will need cleaning, use Super-Clean and Gunk, then hose off. Dry with air. We ran into trouble with the new hubs, the supplied (Genuine) wheel bearings – the outer bearing race for the small bearing did not fit the hub without some detailing work, meaning; Removing burs and making a starting edge to allow the race to be pressed into the hub. The backside of the hub needs beveling too, as the hub seals does not fit correctly (under machined). We highly suggest a different oil seal than the one supplied. (Note: We made one mistake by using a new Stub Axle from ABP – since no one else had one in stock! – and found that the outside diameter was larger than genuine, which resulted in the bearings not fitting… not even the nuts & lock-tabs fitted over the threads! So don’t do that). Now fit the outer drive flanges (or locking hubs), using the 3/8” UNF bolts supplied, but fit lock washers, and use anti-seize on threads. Brake Calipers: Now that we have fitted the hubs and brake discs, making sure to Loctite (blue) disc bolts… we now tried fitted the calipers, and guess what? They don’t fit either! Knowing what we know, the both calipers need to be machined to clear the swivel housing – due to poor castings (this really isn’t a kit for the average garage mechanic). Remember, these are Left & Right handed. Brake System: To do this job right, you need to up-date the brake system to that of a US –Spec Series III, which means; Dual Master Cylinder and booster, the pedal tower for same (which is no longer available from LRUK). Don’t forget you’ll need to fit a later Clutch Master cylinder too. The dual master will require fitting new brake pipes… the larger of the two holes in the master goes to the front wheels, whereas the smaller goes to the rear wheels. But when searching for the pedal tower, make sure you get the following items (which RN never sent us!); 90/564812 Pin (to connect booster to pedal), 569291 x2 return spring, and 338027 x2 plastic plug to seal side of tower, and don’t forget the gasket 90/564832 x2. Completing Conversion: Up-grading the front brakes is a positive, but let's not forget the rear brakes... as they will at least need to be inspected, and possibly overhauled. We suggest that wheel cylinders and shoes be replaced with new ones (don't cheat and try to overhaul the cylinders... the money saved isn't worth the grief of a leaking cylinder when it's time to bleed the brakes. Bleeding: Use ONLY Castrol Brake fluid (or Dot 4 or 5 Synthetic racing brake fluid)... once system is full check for leaks, then proceed with bleeding as per manual... again, check for leaks. |
| Back to Technical Bulletin main page |